
Akamai CDN Setup - Server Side
Overview
The purpose of the Akamai CDN Worker server side implementation is to execute on each request (such as Login or Registration) and ensure the Arkose Token is valid before allowing that request to be fulfilled. The Token can be provided either in the request as either a header or stored as a Cookie depending on the client side configuration. This example is in conjunction with Akamai CDN Setup - Client Side.
Setup
Arkose Verify EdgeWorker
This step is to be configured in conjunction with Akamai CDN Setup - Client Side.
Create EdgeWorker ID
- Open up the Akamai EdgeWorker Management console.
- Select Create EdgeWorker ID.

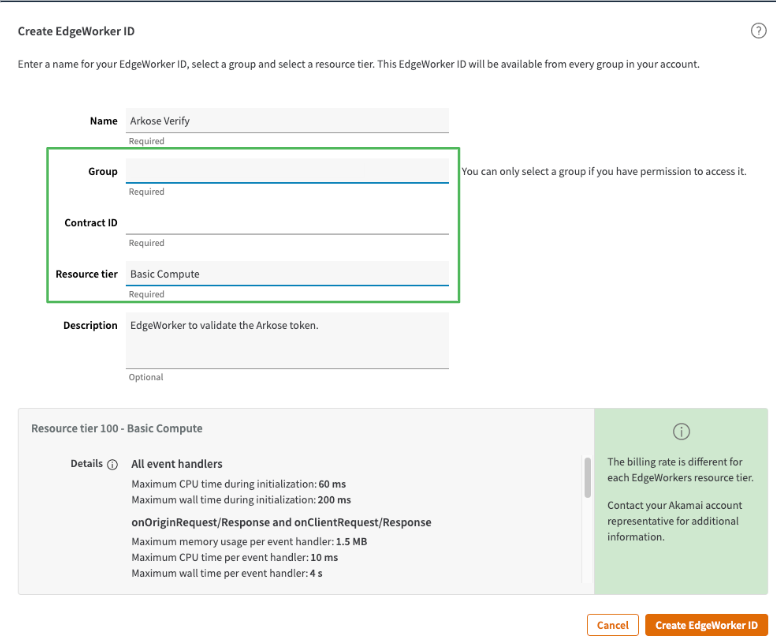
- Give the EdgeWorker a descriptive name.
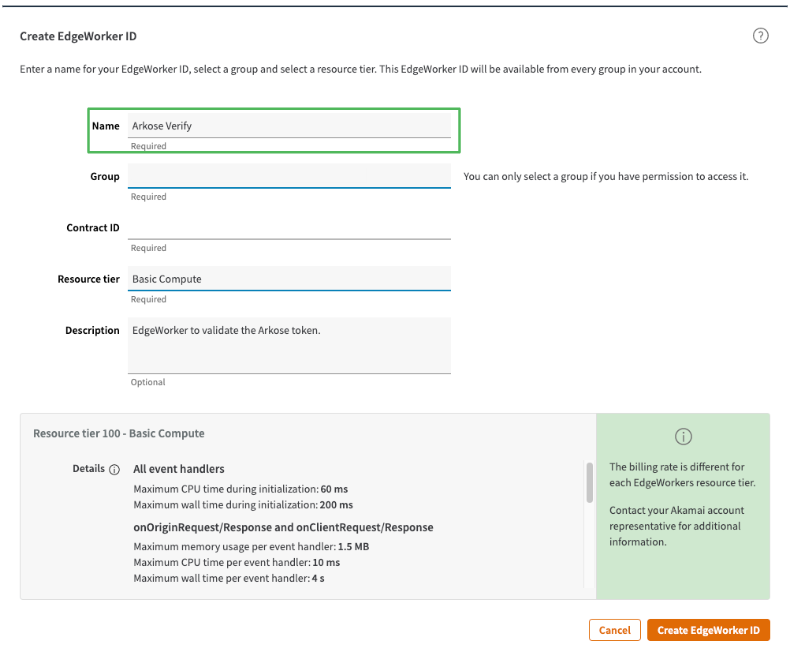
- Select the Group and Contract ID for your Akamai Account.
- The resource tier Basic Compute is sufficient for the worker.
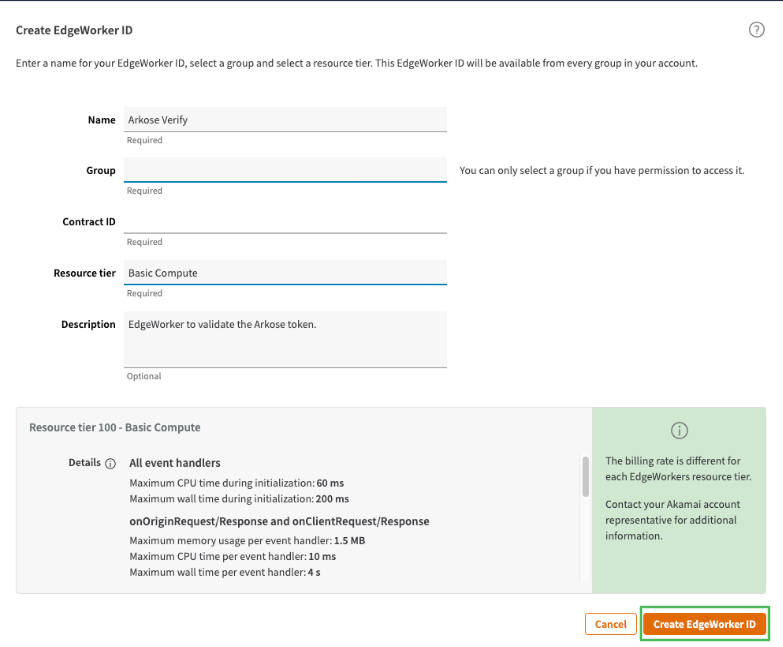
- Select Create EdgeWorker ID.
Edit EdgeWorker
- Now that the EdgeWorker has been created, click on the ID of the created worker.

- Once it opens select Create Version.

- Click on Open Editor.
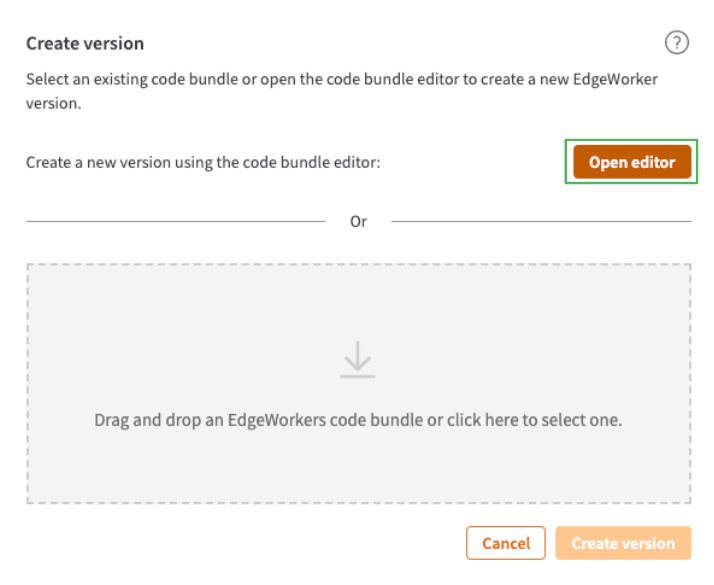
- You will now see the Code Bundle with 2 files:
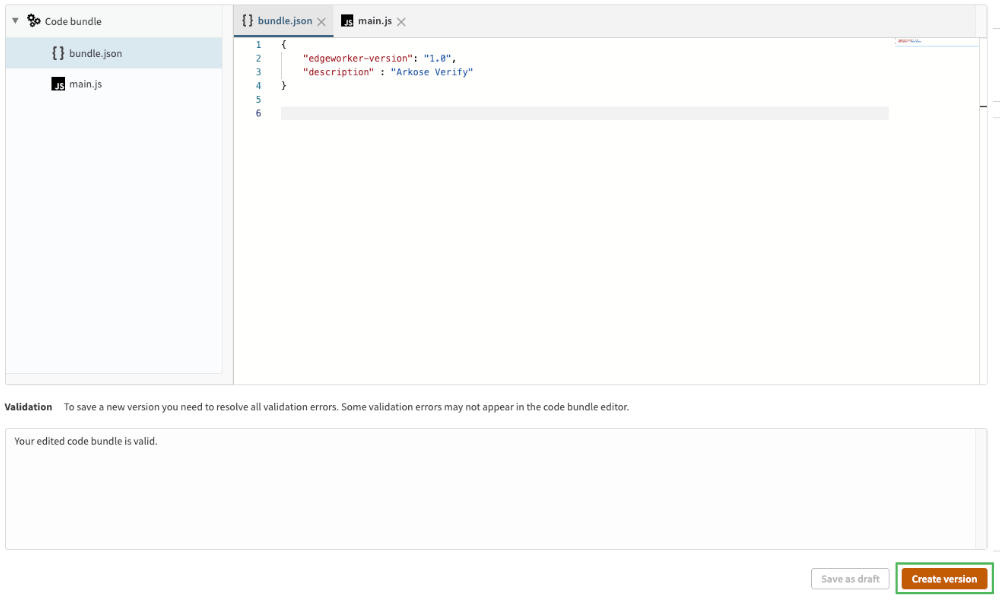
bundle.jsonandmain.js.
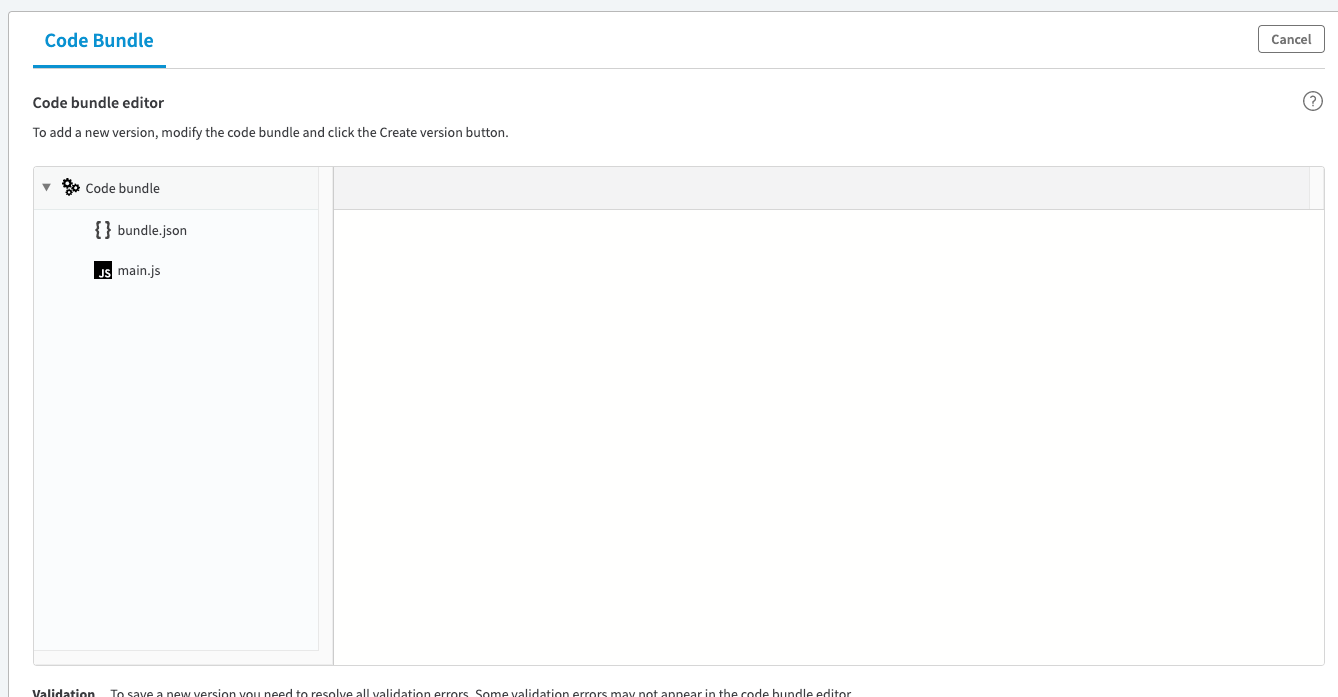
main.jsis the code that will be executed by the EdgeWorker. The Arkose Example repo has an example that outlines the code required, found here: Akamai EdgeWorker Proxy Pattern Example.- The
bundle.jsonfile includes some metadata for the EdgeWorker. Set the name and version appropriately. - Select Create Version.

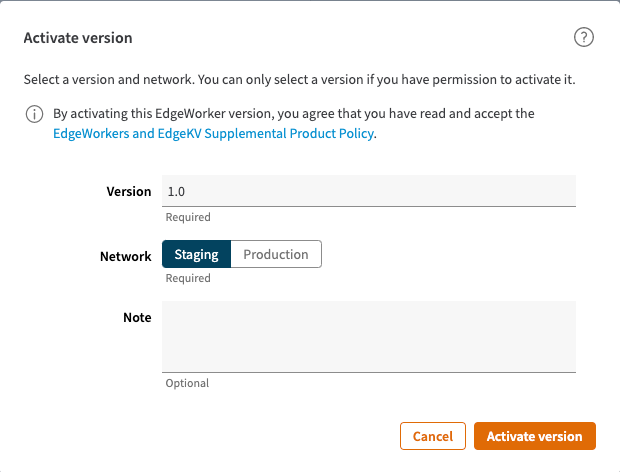
- Back on the EdgeWorker details screen, click on Activate version.
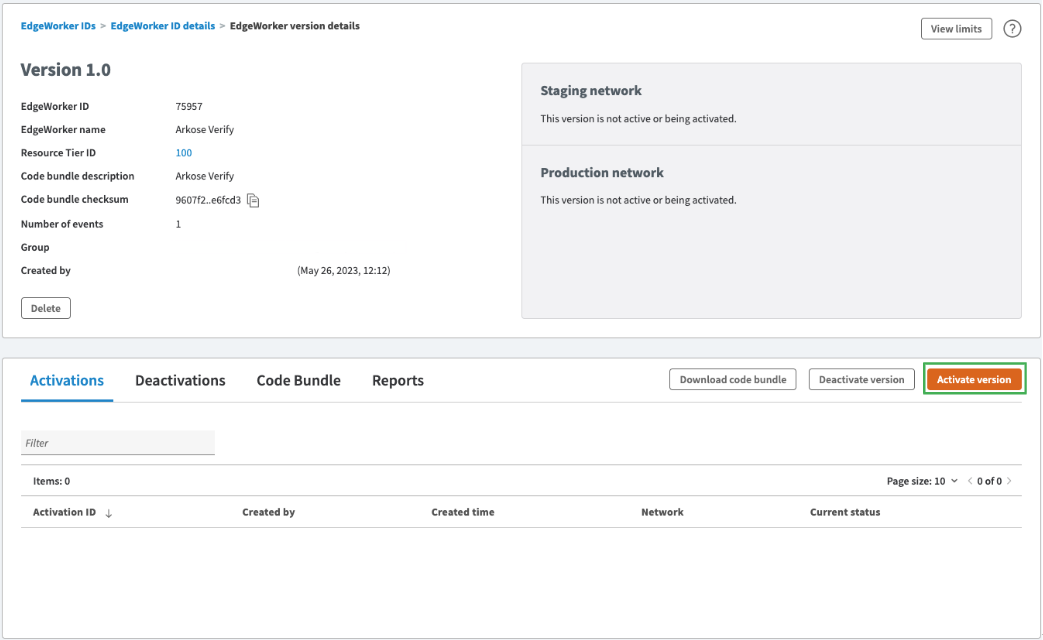
As a matter of testing and due diligence, always deploy a Staging version first before rolling out to Production. At this stage there is no trigger for the EdgeWorker in place so will not be on live traffic.
Setup Akamai Property
An Akamai Property is required to run EdgeWorkers. If you do not already have an Akamai Property, please create one. View reference doc here: <https://techdocs.akamai.com/property-mgr/docs/create-new-prop>.
Once a Property has been setup, ensure that the Origin Server contains the client side code, documentation found here Akamai CDN Setup - Client Side
- To add the required configurations, a new Akamai Property version will need to be created. Navigate to the Property Details page via the Property Manager.
- Select New Version in the Staging Environment.
As a matter of testing and due diligence, always deploy a Staging version first before rolling out to Production.
Set up Variables
-
Under Property Variables, add the variables listed in the table above using the + Variables button. Ensure that the values are configured aptly to your use case.

Our example utilizes Akamai’s User Defined variables, listed below:
Variable Description Default Value ARKOSE_PRIVATE_KEYThe Arkose private key to use with verification. ERROR_URLA url that the user redirects to when verification fails. TOKEN_IDENTIFIERThe property name used to get the token from either the header or cookie. arkose-tokenTOKEN_METHODThe method used for extracting the token, either from the header on the request. Or via a cookie cookieFAIL_OPENIf there is an issue with verification and the Arkose Labs platform currently has an outage, do we allow the request to fail open or do we block the request. trueVERIFY_MAX_RETRY_COUNTThe number of times to retry the verification call if the verification call fails with an error. 3VERIFY_SUBDOMAINSpecific subdomain used for the verification call verify
EdgeWorkers
- To get the EdgeWorker running, Rules will need to be added to the property. Under Property Configuration Settings, Press the + Rules button.
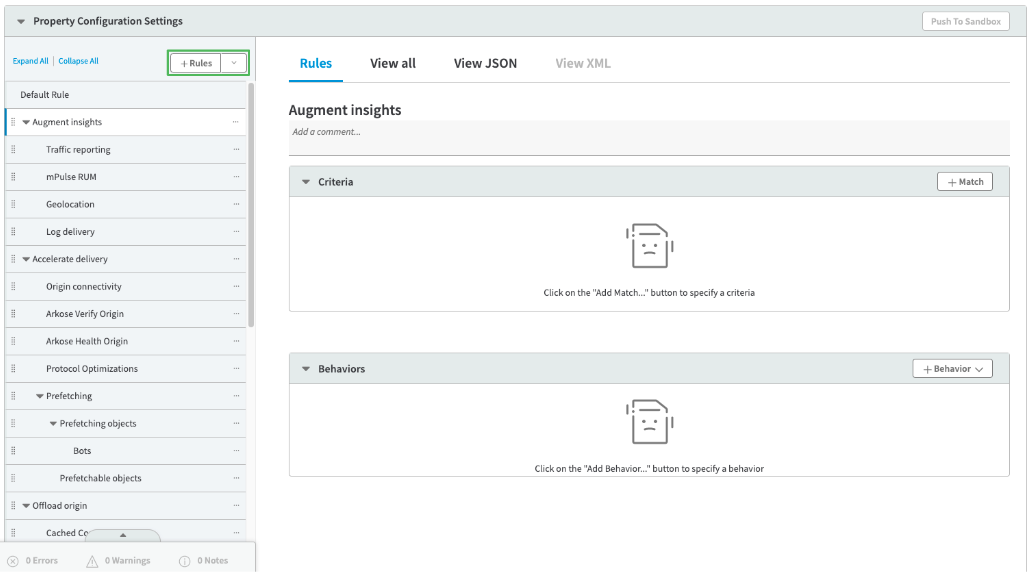
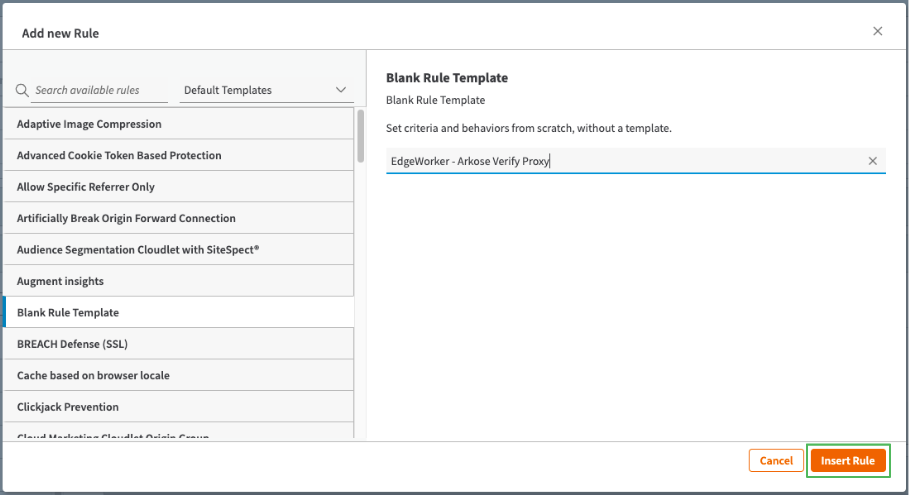
- Select the Blank Rule Template item and name the rule appropriately, such as “EdgeWorker - Arkose Verify Proxy”.
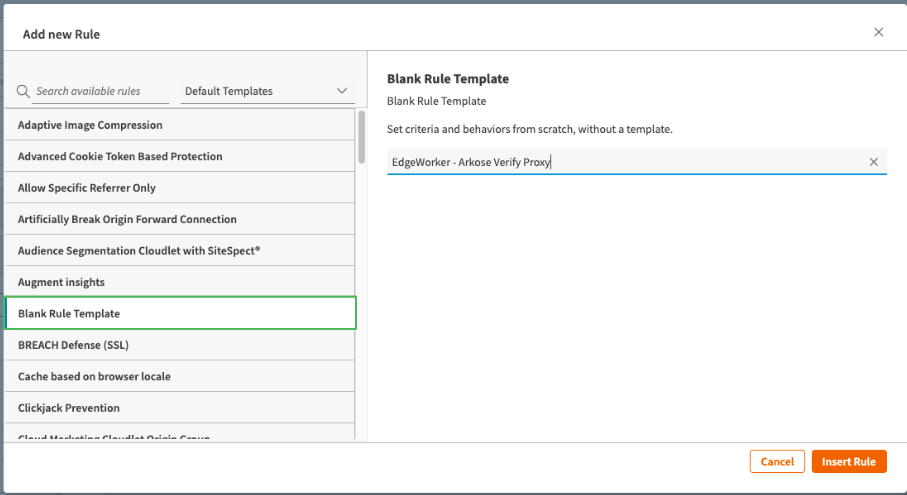
- Select Insert Rule.
- After selecting the Insert Rule button, an empty Rule will appear with Criteria and Behavior sections. Select the +Match button. The condition should be:
- If a Path Matches one of with the value matching the Path that the Client Side Code makes a POST request to. In this example the value is /proxy-verify.
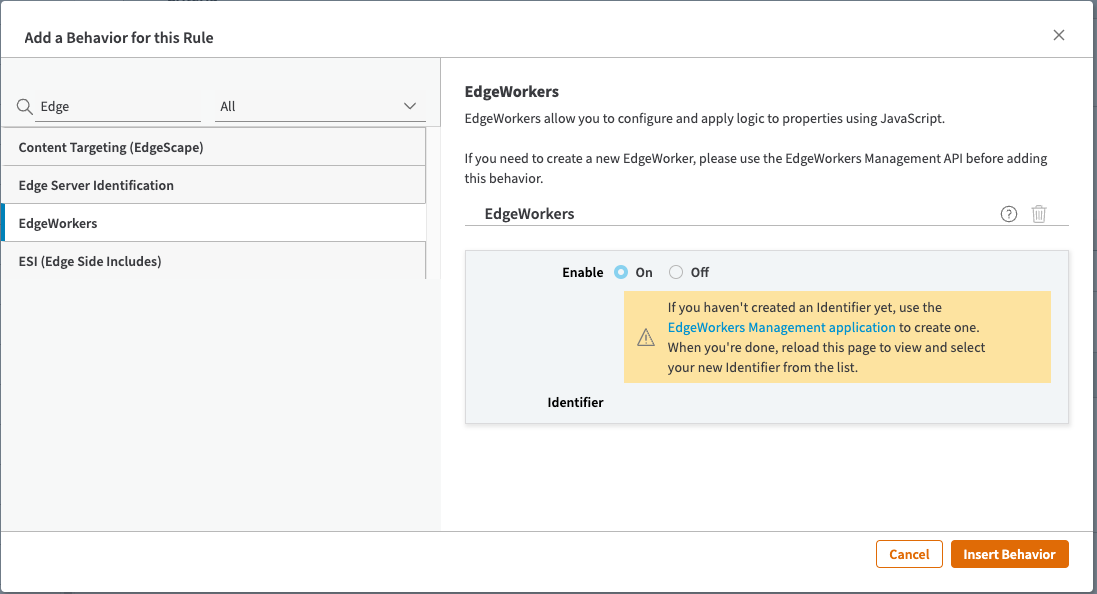
- Add a Behavior by clicking the +Behaviour button. Find the EdgeWorkers behavior and click Insert Behavior. Select the Identifier to match the EdgeWorker created previously.
This step can be repeated for the Inject example.
Origins
EdgeWorkers are not able to make third party http requests and are required to be routed through the Akamai Property Hostname. This requires some rules to be configured to allow external requests to be made.
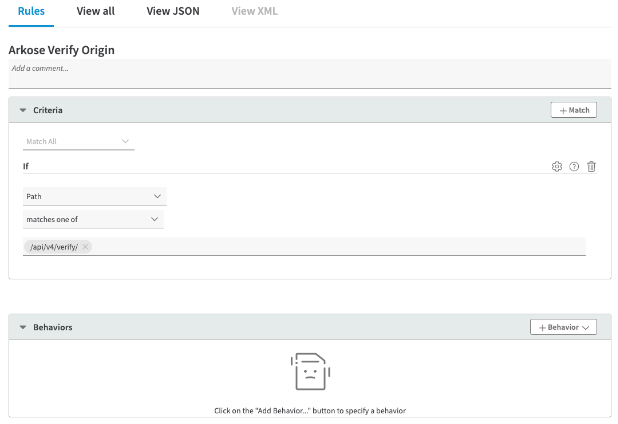
- Arkose Verify Origin
- Similar to the EdgeWorkers rule, create a new Rule with a Blank Rule Template. Name this rule “Arkose Verify Origin”.
- Just like the EdgeWorker Criteria Match, this rule is to match the Path of the request made when running the function
verifyArkoseToken; which is/api/v4/verify.
- In the Behaviors section, select +Behavior and search for the Origin Server in the left side menu.
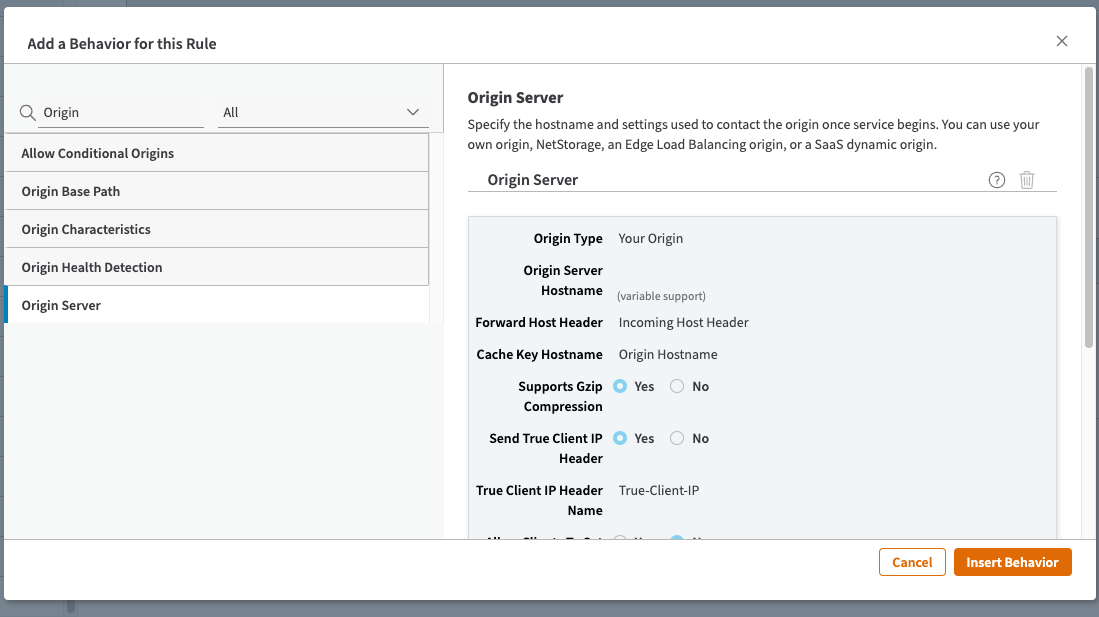
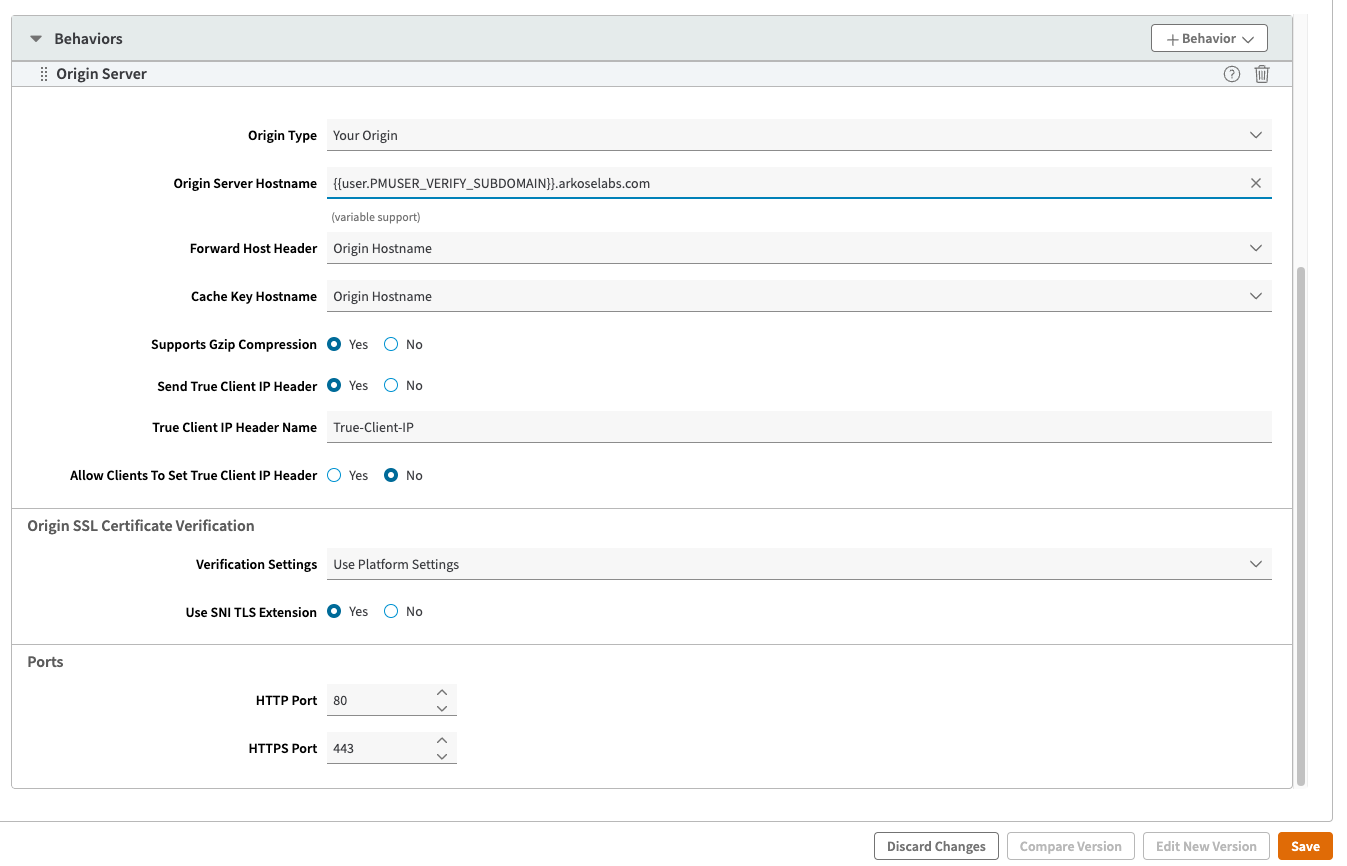
- Add the Origin Server Hostname value as
{USER.PMUSER_VERIFY_SUBDOMAIN}.arkoselabs.com. This uses the User Variable defined earlier as the subdomain. Please consult with your Arkose technical contact on the URL to use for the “Origin Server Hostname”. By default this value isverify.arkoselabs.com.
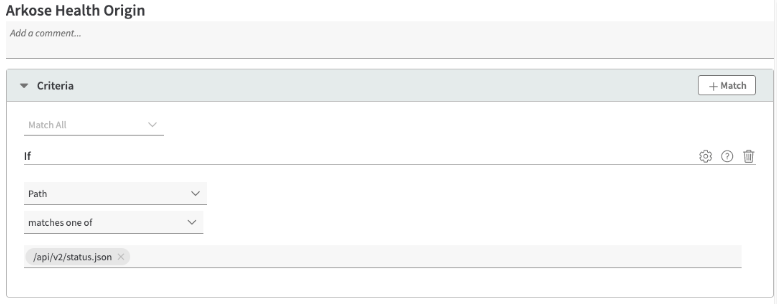
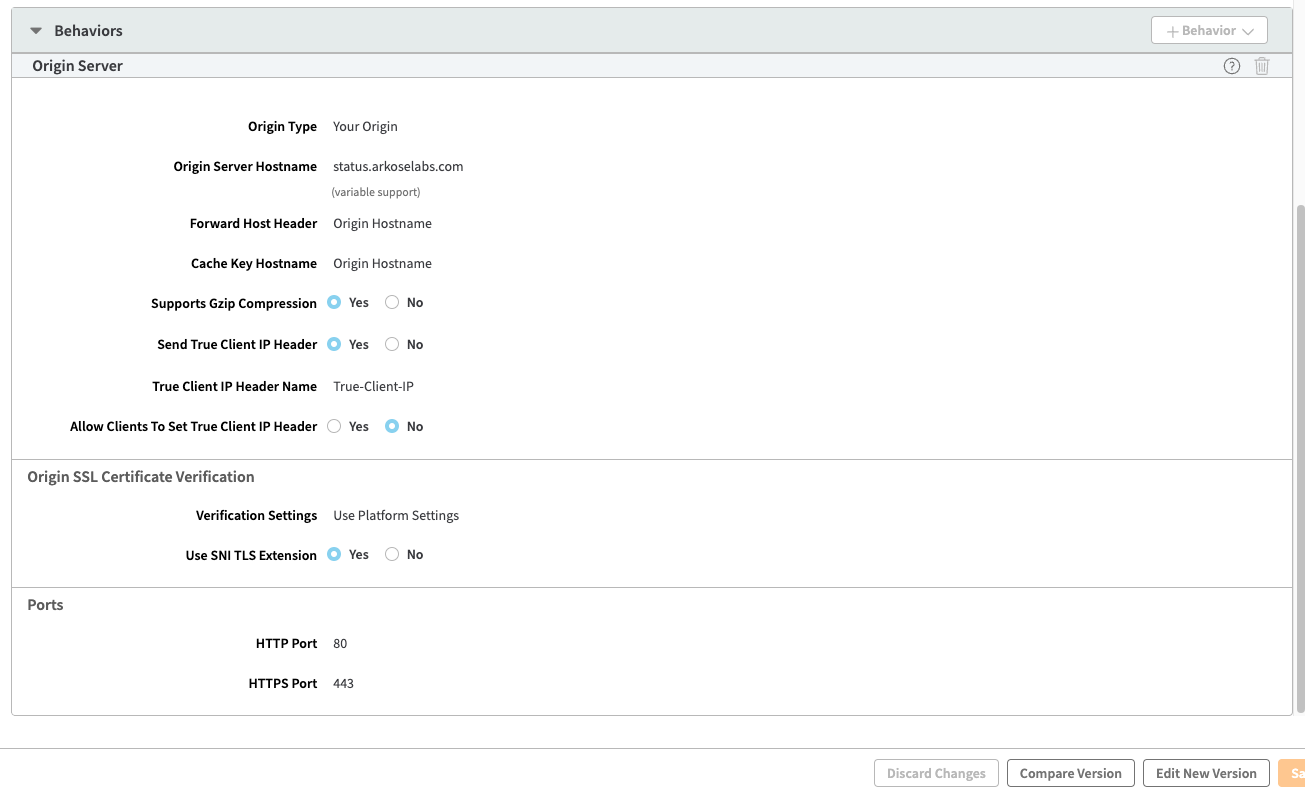
- Arkose Health Origin
- Repeat the previous steps (1) to create a rule for the Arkose Health Status call.
- The differences will be the Criteria section; where the path is
/api/v2/status.json, and the Origin Server Hostname isstatus.arkoselabs.com.
- Customer Login Credentials Origin
- This rule is to be set up for the EdgeWorker to make a call to the endpoint that verifies the User’s credentials. This will be a Customer specific implementation.
- The steps to create this rule will be the same as the Arkose Health and Arkose Verify origins.
- In the example provided, the Path matches to
/apiand the Origin Server Hostname will be up to the Customer to setup, e.g.api.company.com.
- Activate the new Property Configuration by saving the created rules via the Save button.
- Once the changes have been saved, navigate to the Activate Tab at the top left of the Edit page.
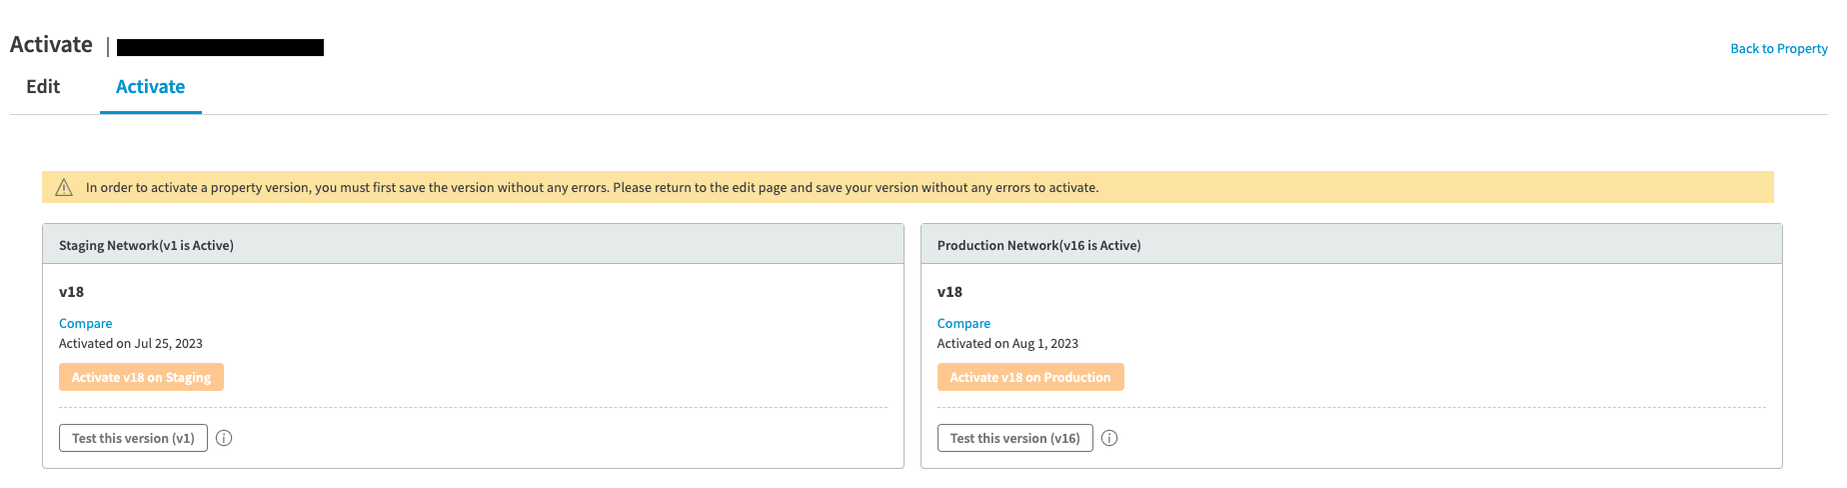
- Activate the changes to the correct Network.
As a matter of testing and due diligence, always deploy a Staging version first before rolling out to Production. - Setup Completed!
Updated about 1 year ago