
Using Auth0 and Arkose for New Account Registration
Overview
This is an overview of how to integrate Arkose Labs Fraud Deterrence Platform directly via the Auth0 development console. There are two basic points of integration:
- The Client API
- The server side token verification API (Verify API)
The client API is simply javascript that is being added to the registration page where Auth0 is implemented for sign-up, the output of which is an Arkose token. And the server side token verification API is the verification of that token (output of client API) via the Arkose verification endpoint.
Integrating the Client API
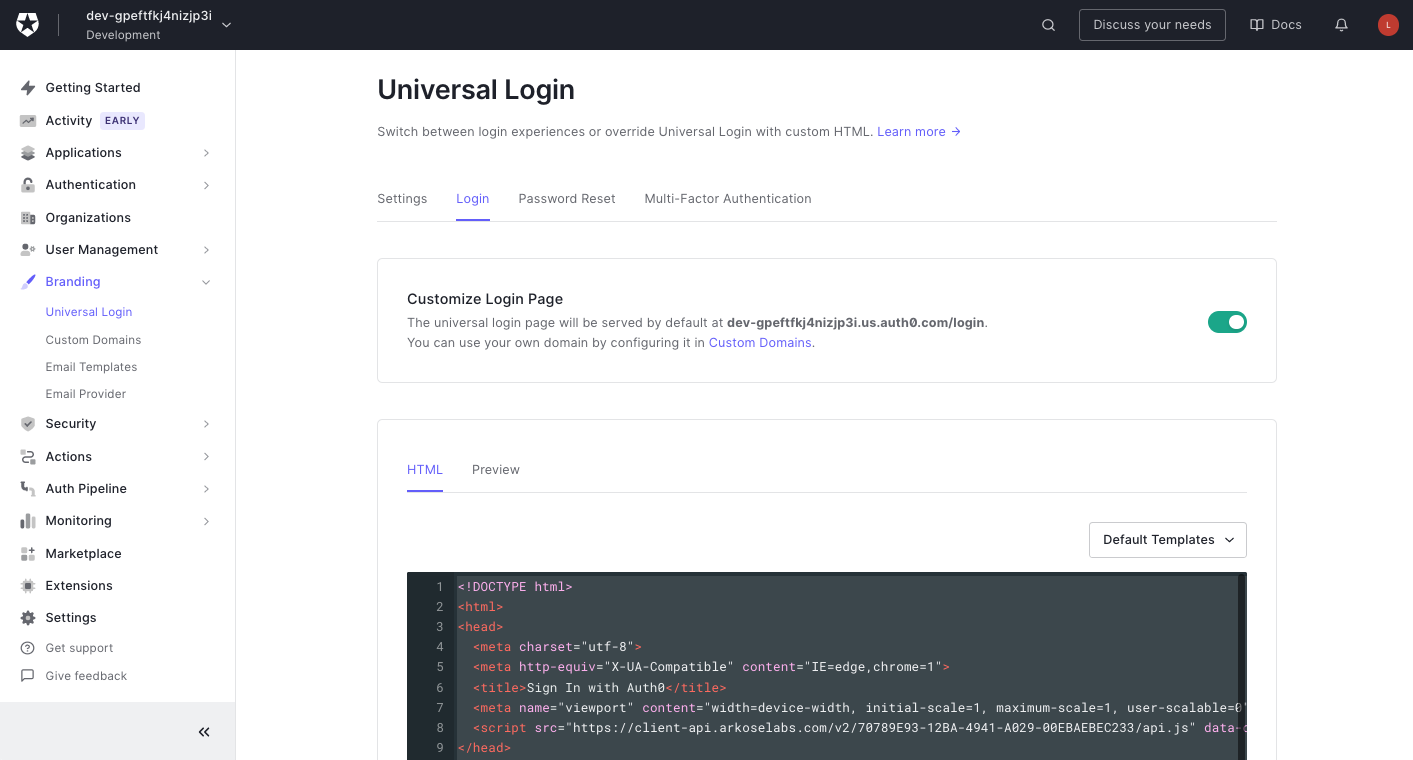
Using the Auth0 “Branding” feature Universal Login you can modify the sign-up page HTML and add the javascript tag to load the Arkose client API. You also add the javascript functions for configuring and running the client API and passing the token to the Auth0 server. For more information on setting up the Client API please go to: Client-Side Instructions.
The Universal Login page provides options to customize Login/Registration widget as below.
Invoke Challenge on Page Load
The below snippet show both ways to invoke the challenge, on page load. It is also possible to integrate on button press or form submit. The demo Key is used to invoke challenge every time.
<!DOCTYPE html>
<html>
<head>
 <!--
    Include the Arkose Labs API in the <head> of your page. In the example below, remember to
    replace <company> with your company's personalized Client API URL name, and replace <YOUR_PUBLIC_KEY> with the public key supplied to you by Arkose Labs, and
    e.g. <script src="//client-api.arkoselabs.com/v2/<YOUR_PUBLIC_KEY>/api.js" data-callback="setupEnforcement"></script>
  -->
  <meta charset="utf-8">
  <meta http-equiv="X-UA-Compatible" content="IE=edge,chrome=1">
  <title>Sign In with Auth0</title>
  <meta name="viewport" content="width=device-width, initial-scale=1, maximum-scale=1, user-scalable=0" />
  <script src="https://<company>-api.arkoselabs.com/v2/<YOUR_PUBLIC_KEY>/api.js" data-callback="setupEnforcement"></script>
</head>
<body>

  <!--[if IE 8]>
  <script src="//cdnjs.cloudflare.com/ajax/libs/ie8/0.2.5/ie8.js"></script>
  <![endif]-->

  <!--[if lte IE 9]>
  <script src="https://cdn.auth0.com/js/base64.js"></script>
  <script src="https://cdn.auth0.com/js/es5-shim.min.js"></script>
  <![endif]-->

  <script src="https://cdn.auth0.com/js/lock/11.32/lock.min.js"></script>
  <script>
    // Decode utf8 characters properly
    var config = JSON.parse(decodeURIComponent(escape(window.atob('@@config@@'))));
    config.extraParams = config.extraParams || {};
    var connection = config.connection;
    var prompt = config.prompt;
    var languageDictionary;
    var language;

    if (config.dict && config.dict.signin && config.dict.signin.title) {
      languageDictionary = { title: config.dict.signin.title };
    } else if (typeof config.dict === 'string') {
      language = config.dict;
    }
    var loginHint = config.extraParams.login_hint;
    var colors = config.colors || {};

    function setupEnforcement(myEnforcement) {
      myEnforcement.setConfig({
        data: '',
        language: 'en',
        onReady: function(response) {
          myEnforcement.run();
        },

       onCompleted: function(response) {
        config.internalOptions['arkoseToken'] = response.token;

     // Available Lock configuration options: https://auth0.com/docs/libraries/lock/v11/configuration
    var lock = new Auth0Lock(config.clientID, config.auth0Domain, {

      auth: {
        redirectUrl: config.callbackURL,
        responseType: (config.internalOptions || {}).response_type ||
          (config.callbackOnLocationHash ? 'token' : 'code'),
        params: config.internalOptions
      },
      configurationBaseUrl: config.clientConfigurationBaseUrl,
      overrides: {
        __tenant: config.auth0Tenant,
        __token_issuer: config.authorizationServer.issuer
      },
      assetsUrl:  config.assetsUrl,
      allowedConnections: connection ? [connection] : null,
      rememberLastLogin: !prompt,
      language: language,
      languageBaseUrl: config.languageBaseUrl,
      languageDictionary: languageDictionary,
      theme: {
        //logo:            'YOUR LOGO HERE',
        primaryColor:    colors.primary ? colors.primary : 'green'
      },
      prefill: loginHint ? { email: loginHint, username: loginHint } : null,
      closable: false,
      defaultADUsernameFromEmailPrefix: false,

  additionalSignUpFields: [{
    type: "hidden",
    name: "arkoseToken",
    value: response.token
  }]
    });

    if(colors.page_background) {
      var css = '.auth0-lock.auth0-lock .auth0-lock-overlay { background: ' +
                  colors.page_background +
                ' }';
      var style = document.createElement('style');
      style.appendChild(document.createTextNode(css));
      document.body.appendChild(style);
    }
    lock.show();
       }
     });
  }
  </script>
</body>
</html>
Passing the Token
config.internalOptions['arkoseToken'] = response.token; is responsible to set the Arkose Token as part of the Registration form, as seen below
"arkose_token": "76762e7ba389f15a6.6902851603|r=ap-southeast-2|metabgclr=%23ffffff|guitextcolor=%23000000|metaicon"
"protocol":"oauth2"
Integrating the Verify API
We leverage an Auth0 “Action” Flow to create the pre-registration action flow. This action flow is configured to verify the token provided by Arkose. The action flow evaluates if the token is valid and solved is true, then we allow the user to move forward. For more information on setting up the Verify API please go to: Server-Side Instructions.
Below is an example of the flow:
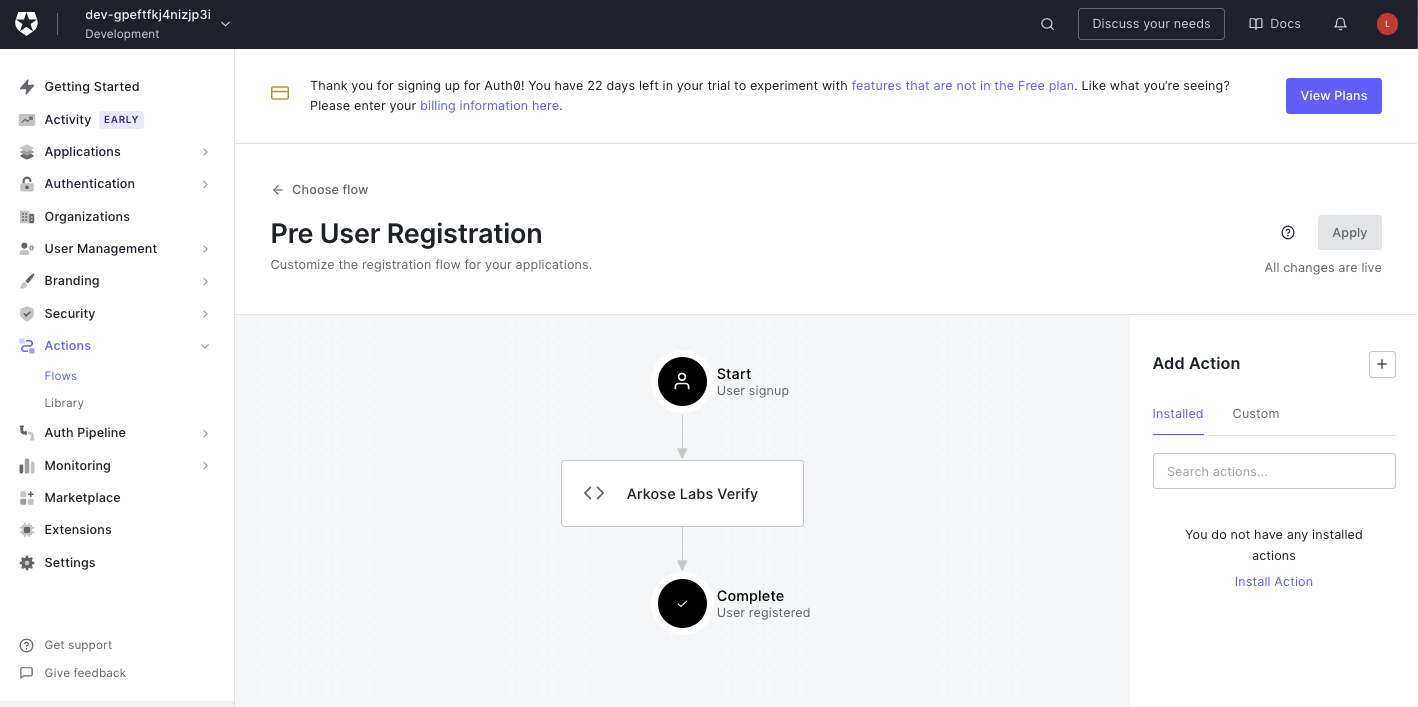
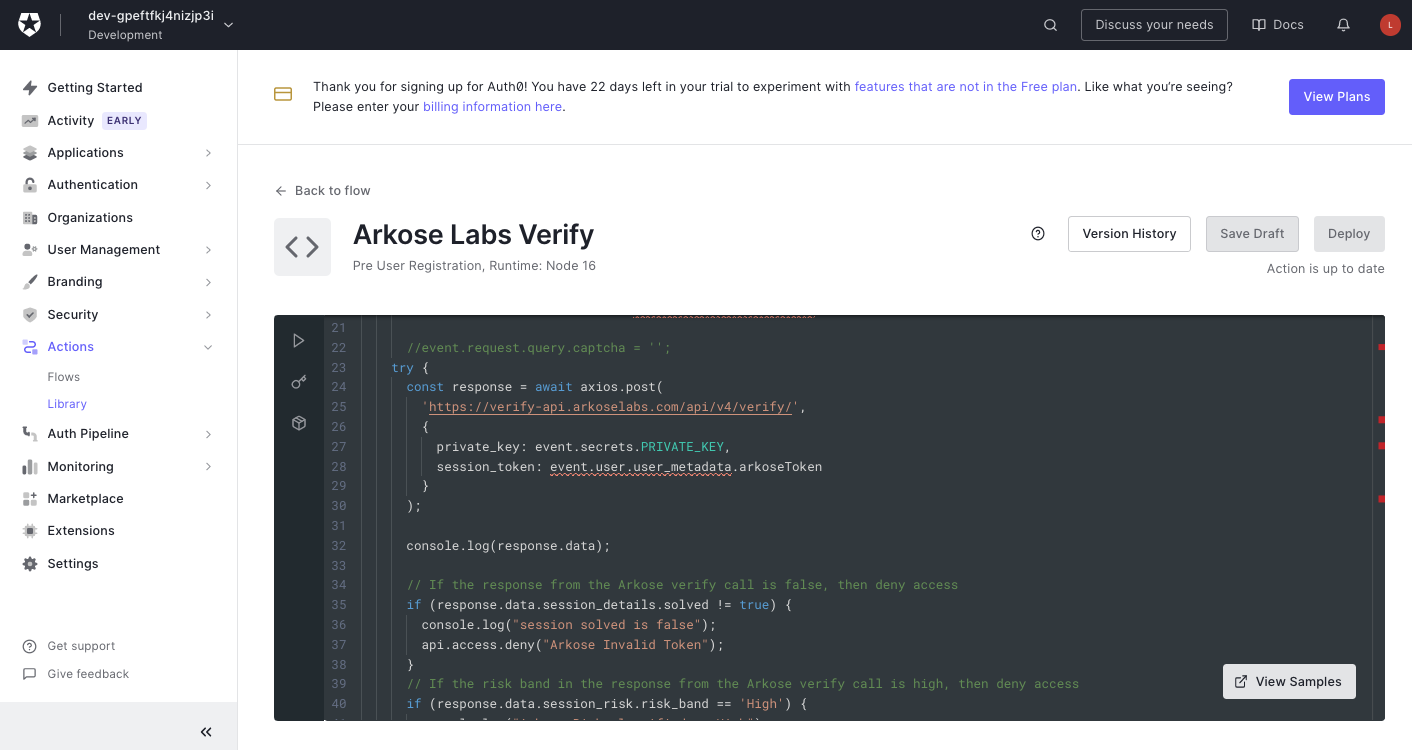
Custom Action - Arkose Labs Verify
A custom action can be written in Auth0 and attached to the Registration Flow. This helps in validating the Arkose Session token that is passed from the client end. Please update the <variable> name in this action depending on whether the token is passed as captcha or Arkose Token or other: event.user.user_metadata.\<variable>
The Arkose Labs private key also needs to be stored as an environment variable.
/**
* This flow is to protect the Auth0 registration flow from a bot attack using Arkose Labs.
* This is the second part of the integration -server side verification of the token.
* The first part is executed on the client side to request the token from Arkose as part of the Detect phase.
* This flow assumed that a registration value was provided for the Arkose Token in a variable called "arkoseToken".
* This flow will terminate a registration in the event of a null token or invalid token.
*/
exports.onExecutePreUserRegistration   = async (event, api) => {
  const axios = require('axios');

  //If the Arkose session token is missing the deny access
  if (!event.user.user_metadata.arkoseToken) {
    api.access.deny('Missing Arkose Session Token!');
  } else {
    // Call the Arkose Verify API, passing in the private key and the session_token
    try {
      const response = await axios.post(
        'https://verify-api.arkoselabs.com/api/v4/verify/',
        {
          private_key: event.secrets.PRIVATE_KEY,
          session_token: event.user.user_metadata.arkoseToken
        }
      );

      // If the response from the Arkose verify call is false, then deny access
      if (response.data.session_details.solved != true) {
        api.access.deny("Arkose Invalid Token");
      }

    } catch (error) {
      // A 400 is returned from Arkose if the private key and token do not match, so
      // catch that and deny access
      if (error.response.status == 400) {
        api.access.deny("Arkose Access Denied!");
      } else {
        // If anything else goes wrong then fail closed and respond with the error
        // receieved
        api.access.deny(error.response.data);
      }
    }
  }
}
Summary
Arkose Labs can be deployed rapidly via the Auth0 development console to quickly enable and protect your pre-registration flow. We would be happy to demonstrate this as a next step.
Updated 4 months ago