
Cloudflare CDN Integration - Auth0
Prerequisites
Auth0 Setup
A custom domain is needed to be setup within the Auth0 platform, this way the CDN can intercept the requests. A CNAME DNS needs to be created with Proxied enabled.
Auth0 Version Support
Auth0 has 2 main modes for Authentication: Universal Login Classic and Universal Login New. Both modes can use the Cloudflare worker to inject client side javascript and server side validation of the Arkose token. Both Auth0 login and registration flows are supported, each has different URLs as shown below. For Universal Login New, the URLs will also differ if using Identifier first or UN/PW only.
| Mode | URL |
|---|---|
| Universal Login Classic Login | https://customdomain/login* |
| Universal Login Classic Registration | https://customdomain/login* |
| Universal Login New Login (Identifier first) | https://customdomain/u/login/password* |
| Universal Login New Login (UN/PW) | https://customdomain/u/login* |
| Universal Login New Registration (Identifier first) | https://customdomain/u/signup/identifier* |
| Universal Login New Registration (UN/PW) | https://customdomain/u/signup* |
Whilst Universal Login Classic does have a HTML editor where you can add the client side Arkose implementation and Universal Login New has the ability to edit the template, having all the code in a single Cloudflare worker allows for a simpler integration.
A worker will run regardless of the client side integration method due to Auth0 using the same URL to render the page and to validate the entered credentials, for Universal Login New this URL is in the format of
https://customdomain/u/login. Auth0 switches between a GET and POST call.
How to Configure
- Access your Auth0 tenant.
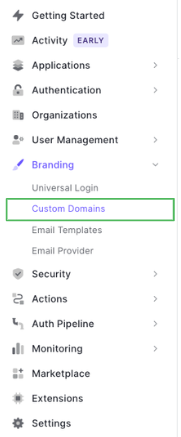
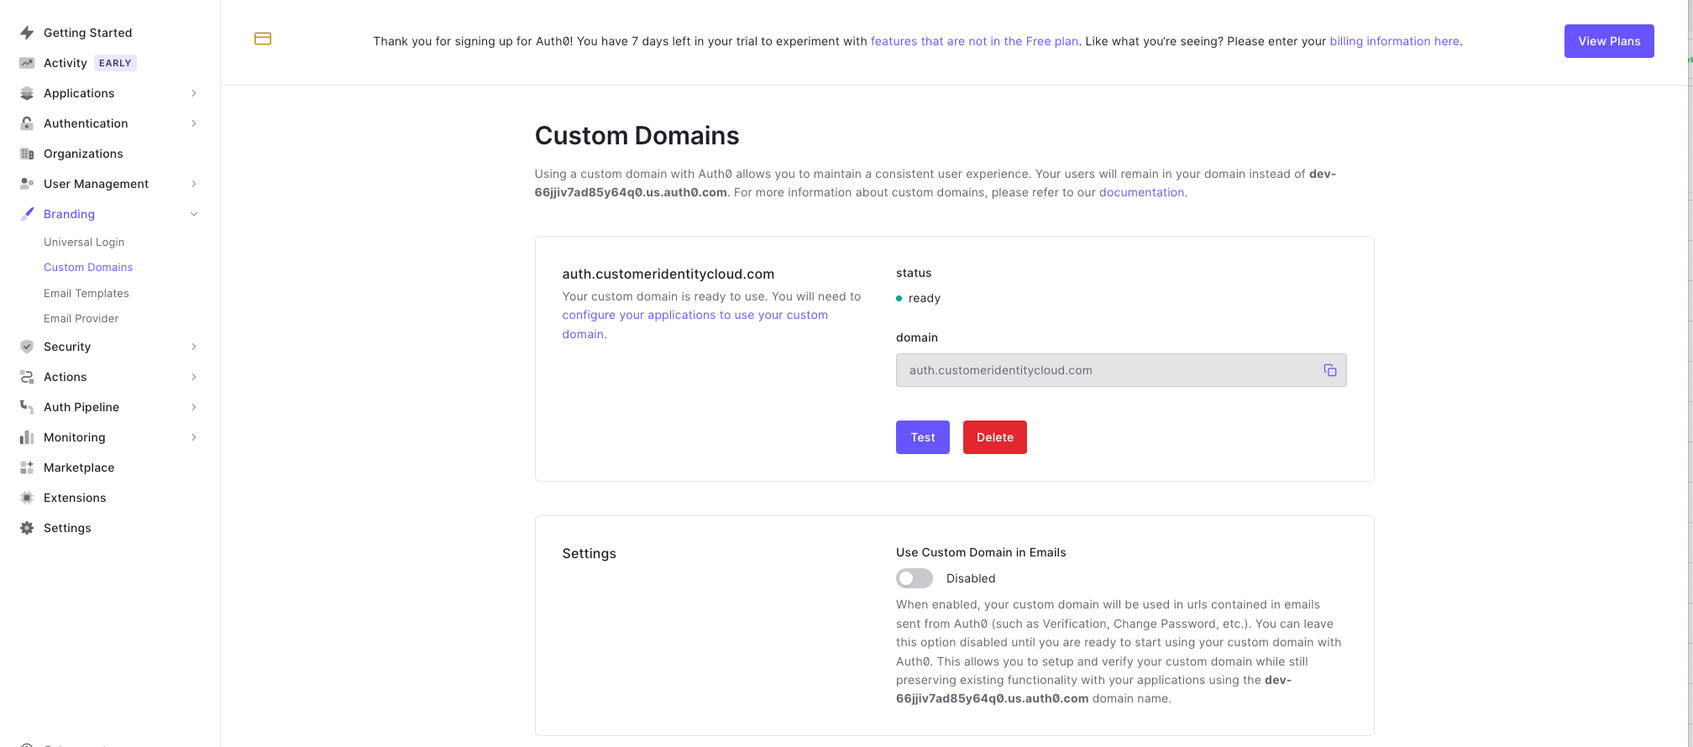
- In the side panel, navigate to Branding -> Custom Domains.
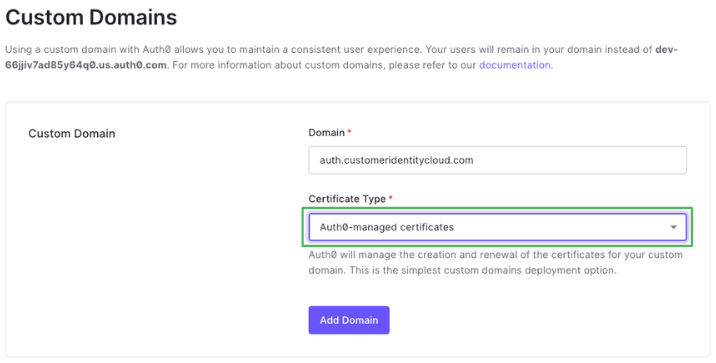
- Input a custom domain and select Certificate Type.
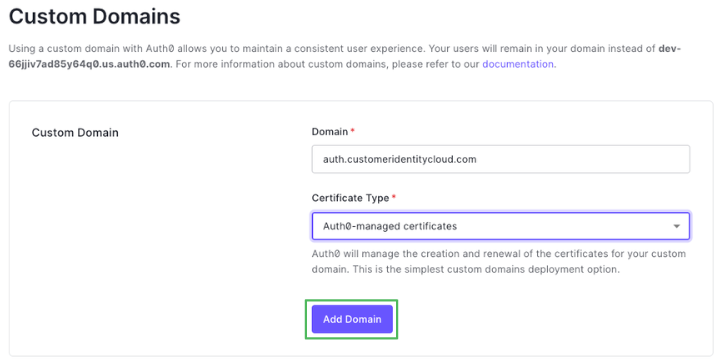
- Select Add Domain.
- Now that the base configuration is set up, the Cloudflare setup can be added.
Cloudflare Setup
The worker logic needs to handle 2 flows:
- Inserting Arkose Labs Javascript: The first is to insert the Arkose Labs javascript client side code for both the scenario when the initial login page loads and after a failed attempt to log in.
- Token Validation through Arkose Labs Verify API: The second flow within the worker is to validate the Token by sending it to the Arkose Labs Verify API.
How to Configure
This step by step guide will walk you through the setup for Universal Login New (Identifier first), for other flows the URLs will be different.
Step 1. Creating a Worker
- Log in to your Cloudflare account.
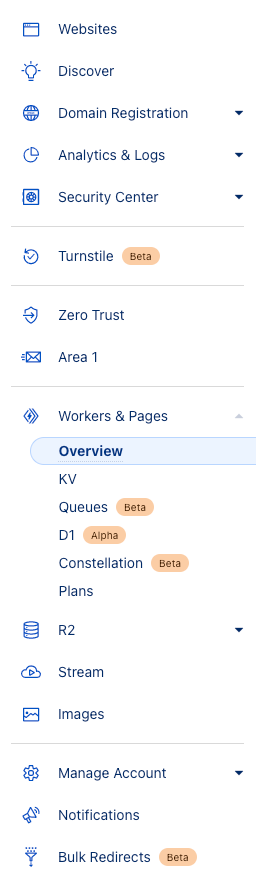
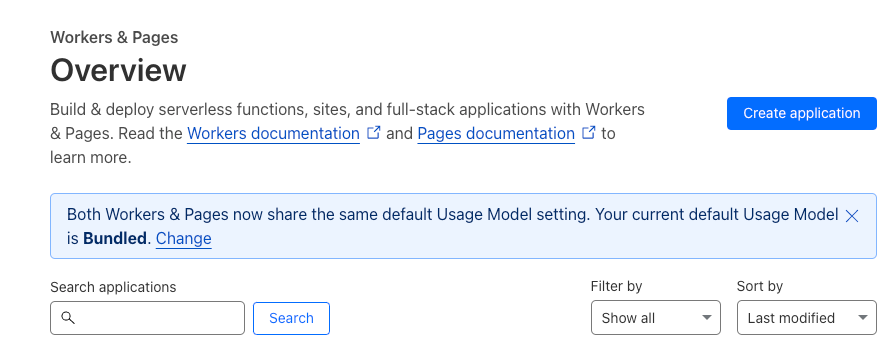
- Navigate to the Workers & Pages section in the side navigation panel and select Overview.
- After the page loads, click Create an Service button.
- Make sure you are on the Workers tab and select Create Worker.
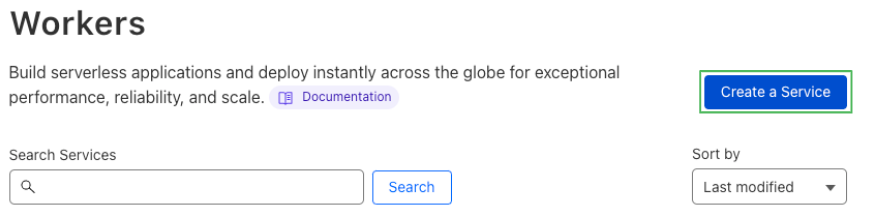
- Provide a name for the worker.
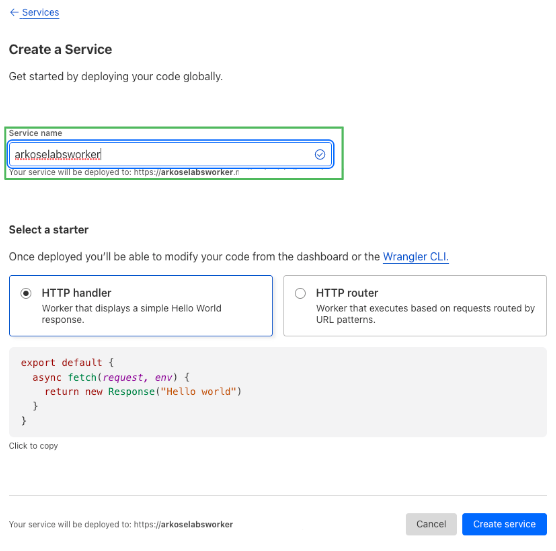
- Leave the default HTTP handler selected and click Create Service.
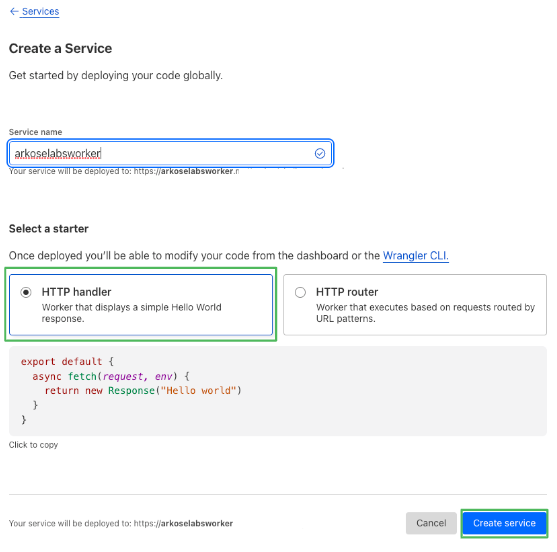
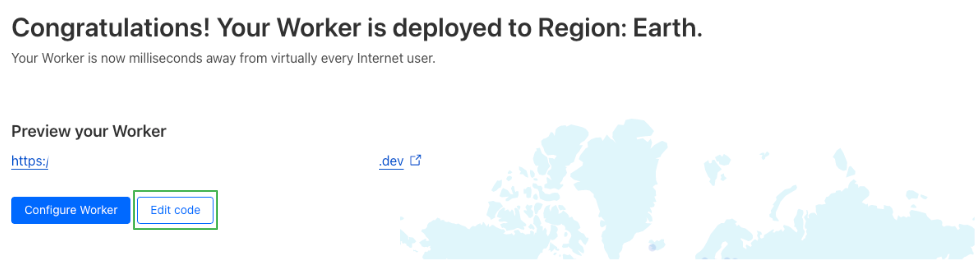
- The Worker has been created, the next step is editing workers code.
Step 2. Adding Arkose Labs Code to Worker
- Once the worker has been created, click on Edit Code.
- Delete the sample code from the
worker.jsfile.
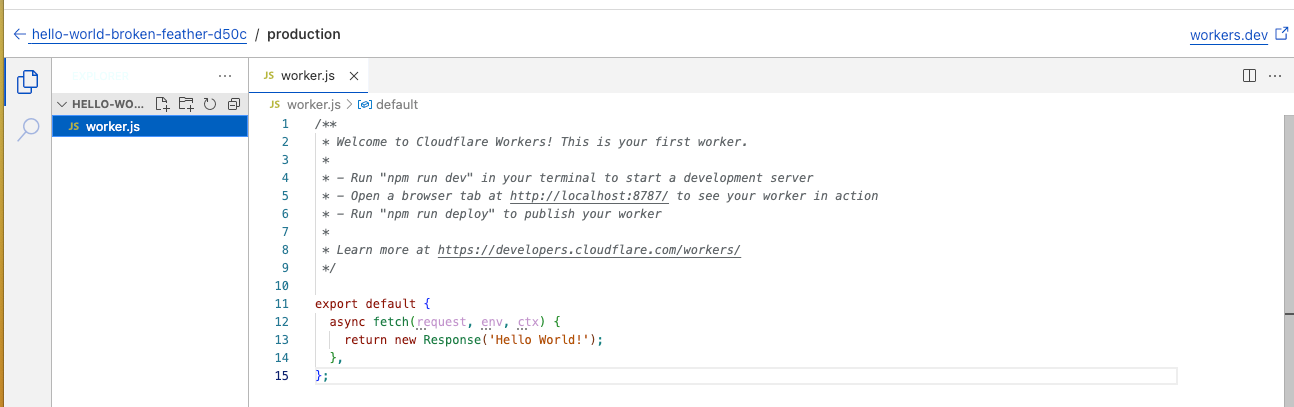
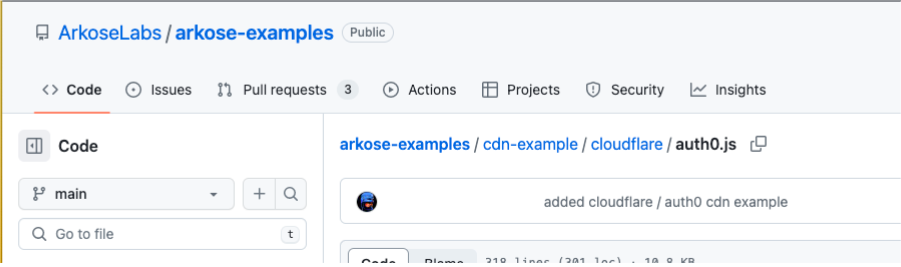
- Open CDN-Examples Auth0 and copy and paste the code into the
worker.jsfile.
- Click on Save and deploy.
Step 3: Add variables to the Worker
-
Navigate to the Settings page of the worker.
-
Select the Variables menu item from the side navigation panel.
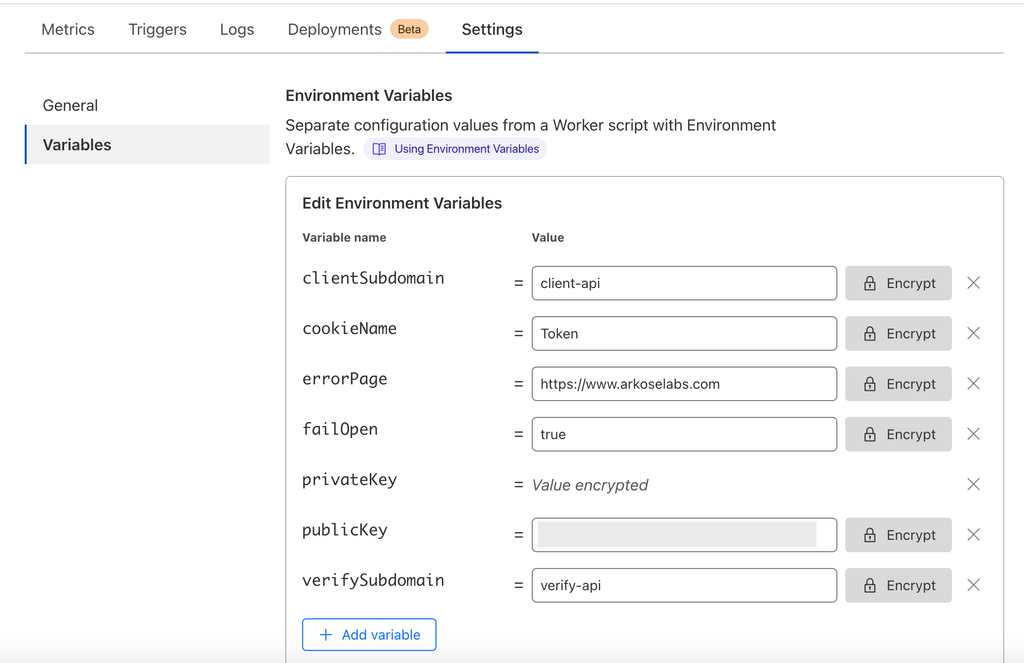
-
Add the following parameters as Worker variables:
Variable Description Sample publicKeyArkose Labs public key obtained through Command Center XXXXXXXX-XXXX-XXXX-XXXX-XXXXXXXXXXXXprivateKeyArkose Labs private key obtained through Command Center XXXXXXXX-XXXX-XXXX-XXXX-XXXXXXXXXXXXclientSubdomainClient subdomain name provided to you via the Arkose Labs team. Default “client-api” will always work for the keys. client-apiverifySubdomainVerify subdomain name provided to you via Arkose Labs team. Default “verify-api” will always work for the keys. verify-apierrorUrlA page to route the user to when an error occurs (outside of fail open). https://www.arkoselabs.com arkoseCookieLifeThe length of time the Arkose cookies should be active for (in milliseconds). 30000(5 minutes)arkoseCookieNameThe name of the cookie that the Arkose token will be stored in. arkoseTokenarkoseErrorCookieNameThe name of the cookie that an Arkose error will be stored in. arkoseErrorscriptMaxRetryCountThe number of times to retry resetting Arkose if there is a client side error. 3verifyMaxRetryCountThe number of times to retry verification if there is an error. 3failOpenIf Arkose has an outage, can Arkose be bypassed. true -
Make the privateKey encrypted by selecting the Encrypt button.
-
Click Save and Deploy
Step 4: Adding triggers to the Worker
- Navigate to the Worker page and select the Triggers tab.
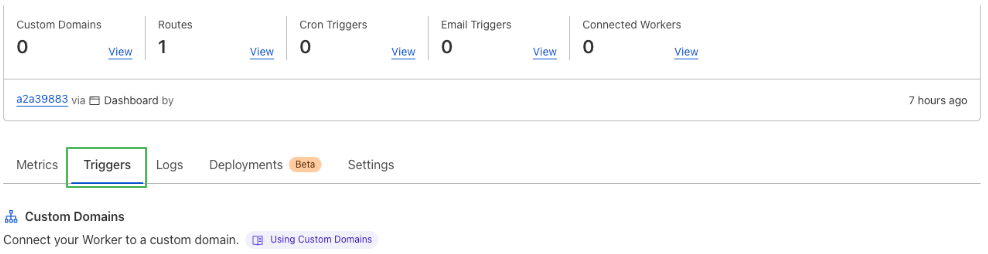
- Click on Add route.

- Enter the route name with the following format
customdomain/u/*(no https is needed).
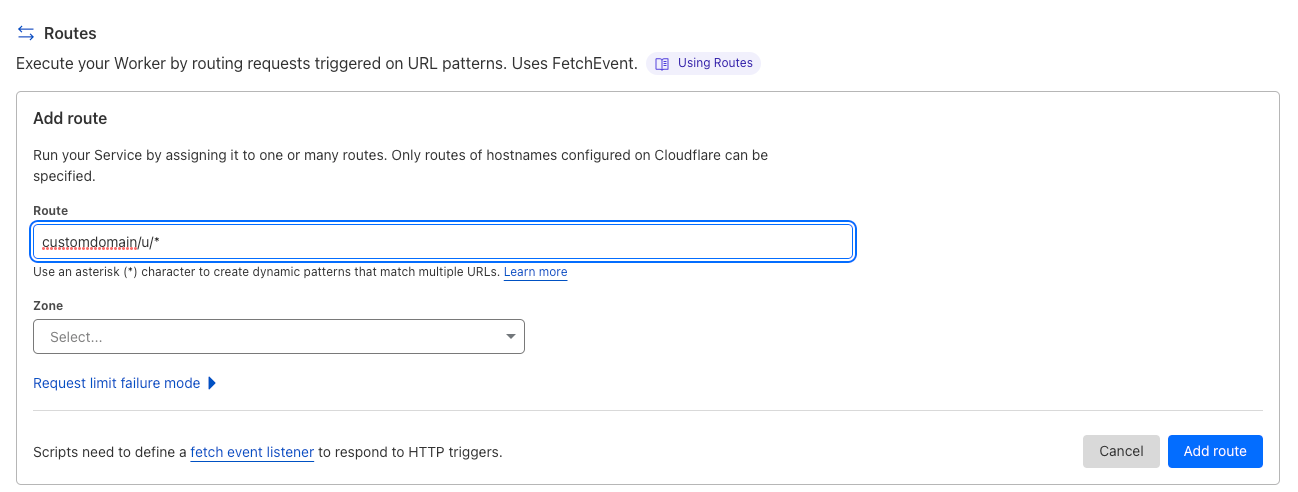
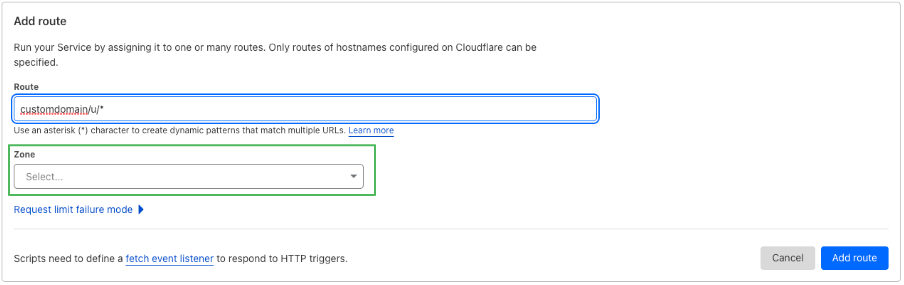
- Select the domain Zone from the dropdown menu.
- Click on Add route.
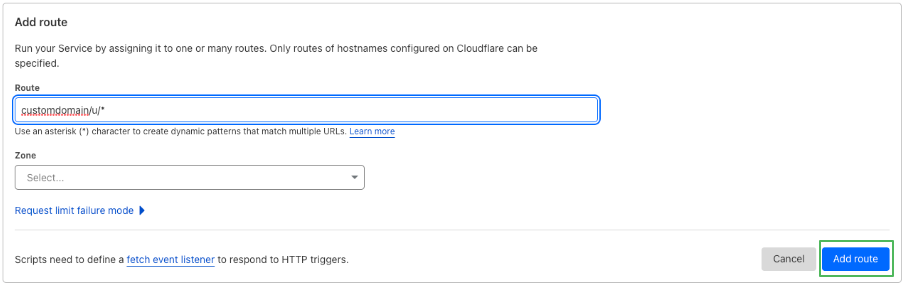
- Once the route is added, the setup has been completed.
Updated over 1 year ago