reCAPTCHA to Arkose Labs Migration Guide
This document contains the steps needed to migrate from reCAPTCHA to Arkose Bot Manager.
Migration to Arkose Bot Manager requires three steps:
-
Get a private/public key pair so Arkose Labs can authenticate you when using the client and server-side APIs
-
Update your client-side code by replacing the script tags that are used for reCAPTCHA with the Arkose Labs client-side script tags, using your public key
-
Update your server-side code to call the Arkose Labs Verify API using your private key and passing in response.token provided by the client-side onCompleted API callback function.
If you only use reCAPTCHA v3, reCAPTCHA Enterprise, or use both reCAPTCHA v3 and v2 then you can migrate to Arkose Bot Manager.
Get a Private/Public Key Pair
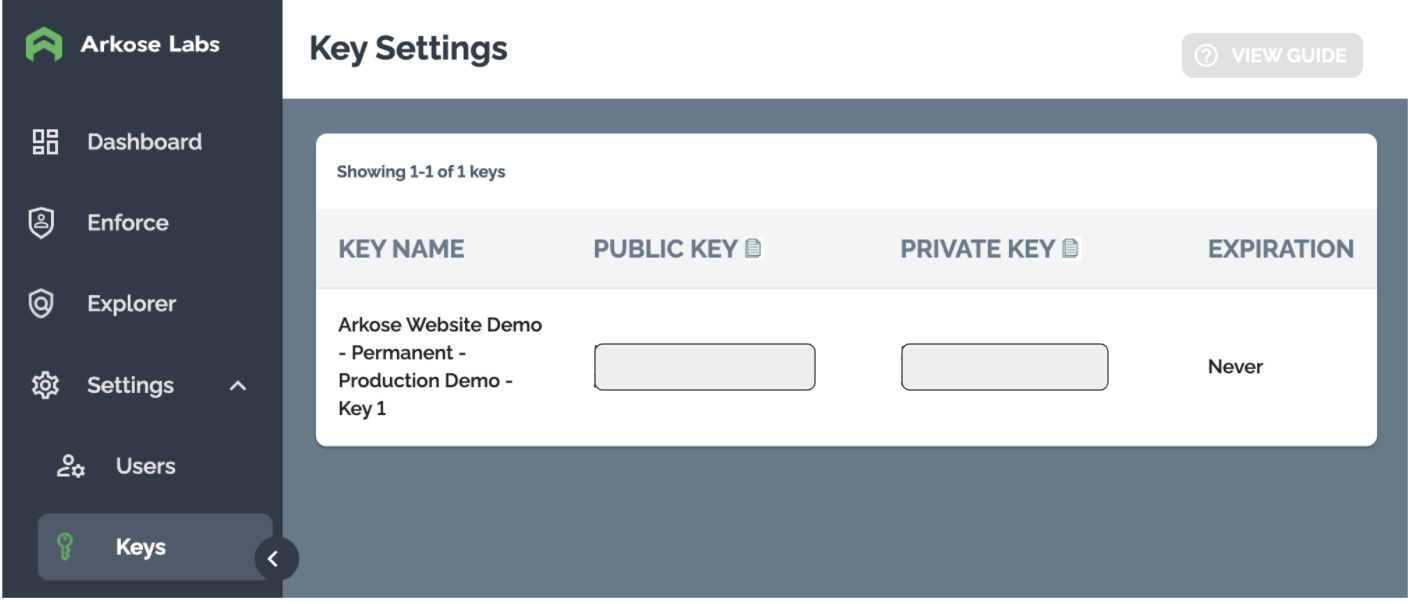
Arkose Labs authenticates your API requests using a private/public key pair that can be retrieved from the Keys page of the Arkose Labs Command Center. As shown below, go to the left menubar's Settings entry, and then to the Keys sub-entry. If you do not have access to the Command Center or do not have your private and public keys, contact your Sales Rep or Sales Engineer.

Update Your Client-Side Code
When using reCAPTCHA your client-side code will contain script tags, similar to those shown below, that set up the reCAPTCHA API:
<!-- Load the Javascript API -->
<script src="https://www.google.com/recaptcha/api.js" async defer></script>

<!-- Add a callback function to handle the token -->
<script>
  function onSubmit(token) {
    document.getElementById("demo-form").submit();
  }
</script>
The reCAPTCHA script tags should be replaced with script tags that load and configure the Arkose Labs API, like those shown in the example below:
<!-- Load the Arkose Labs Javascript API

    Include the Arkose Labs API in the <head> of your page. In the example below, remember to
    replace <company> with your company's personalized Client API URL name, and replace <YOUR PUBLIC KEY> with the public key supplied to you by Arkose Labs.
    e.g. <script src="//client-api.arkoselabs.com/v2/<YOUR_PUBLIC_KEY>/api.js" data-callback="setupEnforcement"></script>
  -->

 <script src="//<company>-api.arkoselabs.com/v2/<YOUR_PUBLIC_KEY>/api.js" data-callback="setupEnforcement"></script>

 <script>
    <!-- Configure the Arkose Labs API and configure the appropriate callback functions -->
    function setupEnforcement(myEnforcement) {
      myEnforcement.setConfig({
        selector: '#enforcement-trigger',
        onCompleted: (response) => {
          <!-- Pass response.token to the server-side code -->
          <!-- If the response from the server-side code is that the session was solved -->
          <!-- then the form should be submitted e.g. document.getElementById("demo-form").submit(); -->
        }
      });
    }

    <!-- Prevent normal form submission so that submission can be done based on the Arkose verification -->
    function preventSubmit(event) {
      event.preventDefault();
    }
    const form = document.getElementById('demo-form');
    form.addEventListener('submit', preventSubmit);

 </script>
The YOUR PUBLIC KEY element of the script src attribute URL should be replaced with the public key described in the Get a Private/Public Key Pair section above.
Both solutions attach their API to an element within the DOM and this also needs to be changed. The example below shows how reCAPTCHA can be attached to a button tag:
<!-- Add attributes to the button that will trigger the reCAPTCHA API -->
<button
    class="g-recaptcha"
    data-sitekey="your_site_key"
    data-callback='onSubmit'
    data-action='submit'
>Submit</button>
The reCAPTCHA code should be replaced with a DOM element that contains the id attribute value defined in the selector parameter when configuring the Arkose Labs client-side API, for example:
<!-- Add attributes to the button that will trigger the Arkose Labs API -->
<button id="enforcement-trigger">Submit</button>
More information on the different API callbacks that are available and how to retrieve the response.token value can be found in the Client-Side Instructions.
Update Your Server-Side Code
Once an Arkose Labs session has been successfully completed i.e. the onCompleted:(response) => {} function is called, the value of the token key within the response JSON object should be sent to your server for verification. Your server-side code should take the token and pass it to the Arkose Labs verify API:
https://<company>-verify.arkoselabs.com/api/v4/verify/Full details on how to implement Arkose Labs server-side verification are in the Server-Side Instructions.
Updated 4 months ago